
Cloud, DevOps, SRE, Frontend Dev & Privacy Advocate.
♲What is Rclone
Rclone is an open source command-line program written in Go, used to manage or migrate files on cloud storage. It supports 40+ cloud services including all the mainstream providers like Google Drive, DropBox, Mega, pcloud, S3 only to name a few. Rclone enables users to manage the cloud interface right from their terminal. It has gained so much appreciation that users call it "The Swiss Army Knife of cloud storage" and often refer it to as "Technology indistinguishable from magic".
📥 Installation
The installation process is quite straightforward actually. For Windows there is an executable that you can simply download as a zip archive and extract into a location of your choice and then open the Cmd in the same directory or optionally add the directory PATH to env. To install rclone on Linux/macOS/BSD systems, run:
$ curl https://rclone.org/install.sh | sudo bash
If you are on macOS & have Homebrew installed, run this command followed by the Enter key to install rclone.
$ brew install rclone
Now that we are done with installation, let's get familiar with some basic terminology of Rclone.
📜 Terminology
Remote : A remote is simply the cloud service you have mounted on your system using rclone, for instance, if you have configured access to your Dropbox account using rclone then the Dropbox is your remote. If it's Google drive that you mounted, then Google Drive is your remote. Also note that we can have multiple number of remotes configured at the same time. For example, having 4 Mega, 3 Google Drive, and 2 pCloud accounts configured at the same time is completely normal.
Commands : We use commands with rclone. The commands which make sense in the context of cloud storage can be used with rclone. For e.g,
copy,sync,move,deleteamong many others can be used with rclone to manipulate files in cloud storage. Usually every rclone commands accepts two parameters, source and destination, now let's understand what they mean.
Suppose we have Google Drive & Dropbox accounts mounted as two distinct remotes and we are interested in copying files from Google Drive to Dropbox. In this context the Google Drive will be called a Source, which gets accepted as a first parameter of the rclone command and the Dropbox will be referred to as Destination.
Now that we all well versed with the basic terminology, let's dive into configuring the rclone remotes.
⚙️ Configuring a remote
To get started with configuration, on Windows open the Cmd in the same directory where you extracted the .exe of rclone and type the following command. In *nix based OS open your terminal & run:
$ rclone config
Because we have no remotes configured yet so we will get a response reading "No remotes found" and a prompt asking to choose an option:
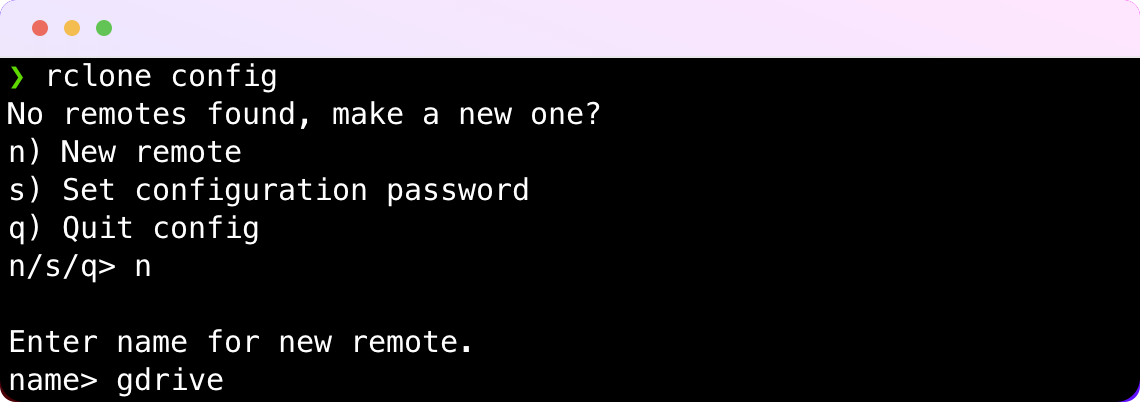
Press n to create a new remote. The next prompt is to choose a name. Set a desired name for your remote and hit enter. This name will be used to identify this remote later. Next we are presented with a list of all available cloud storage rclone supports and we need to select the desired service.
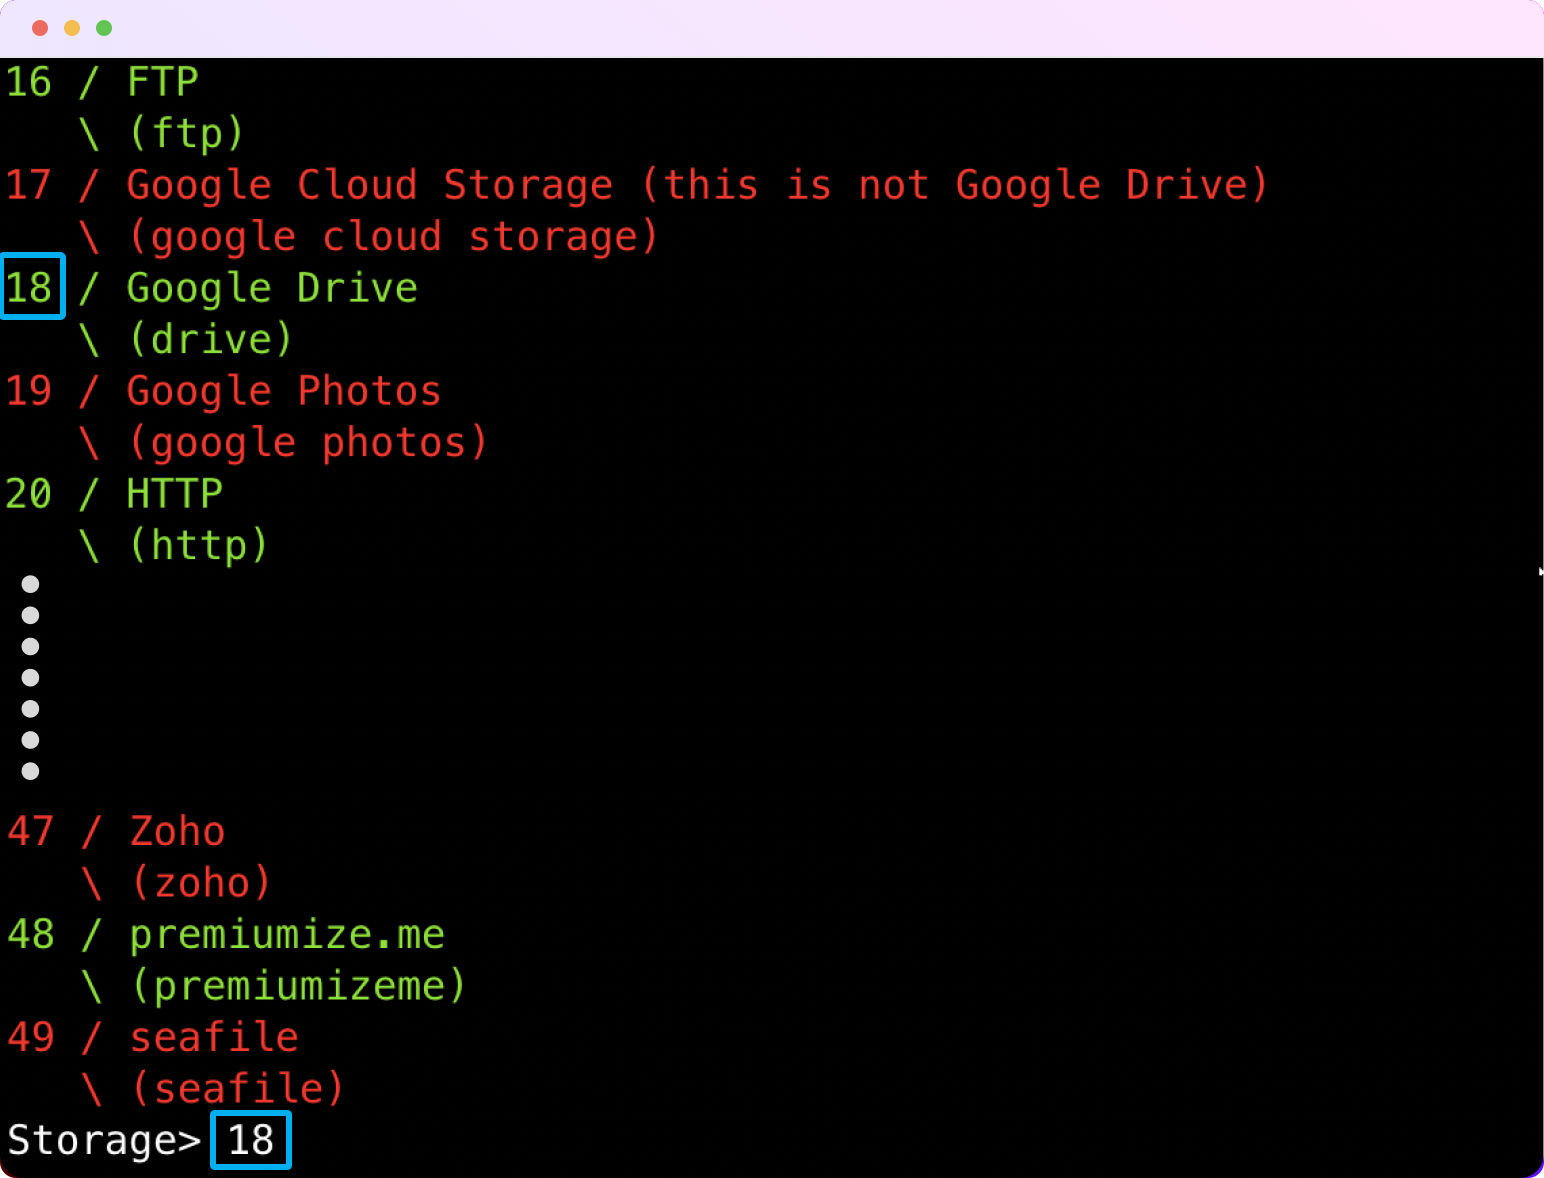
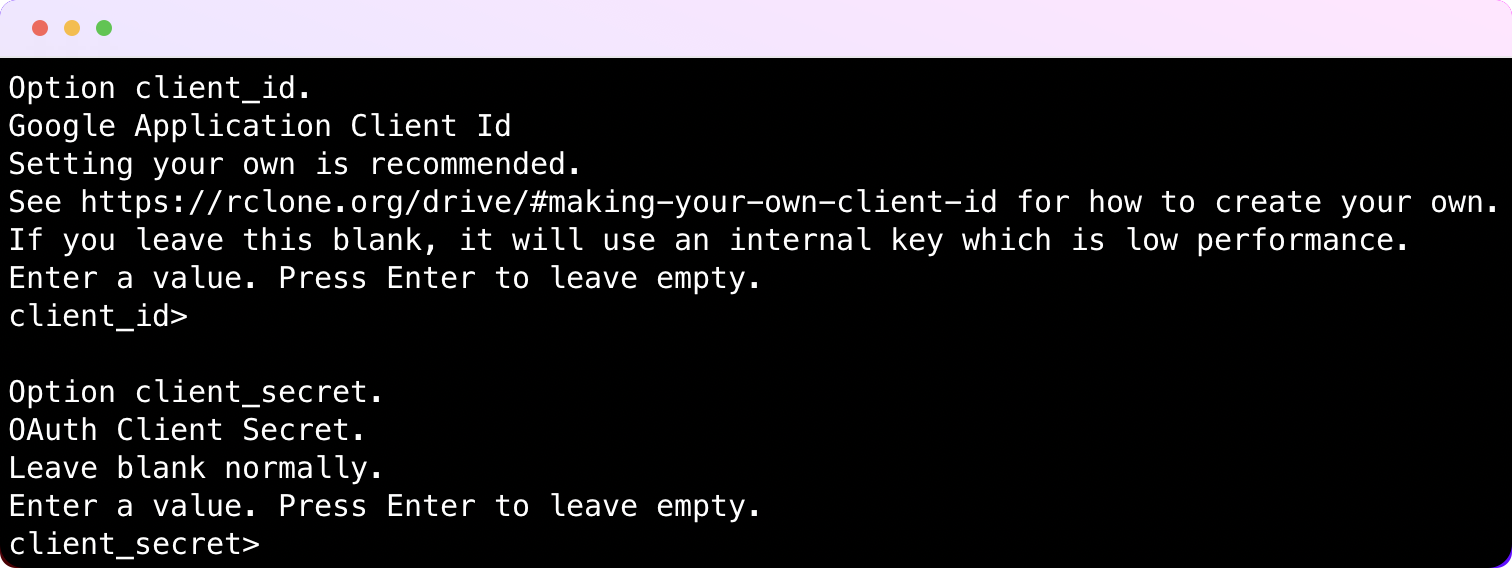
Since I want to configure Google Drive, so I will type 18 and hit enter. Now the prompt will ask for Client Id first and then Client_secret. They are usually required for advanced usage like dealing with APIs, these fields are not mandatory so for now they can be skipped by simply hitting enter.
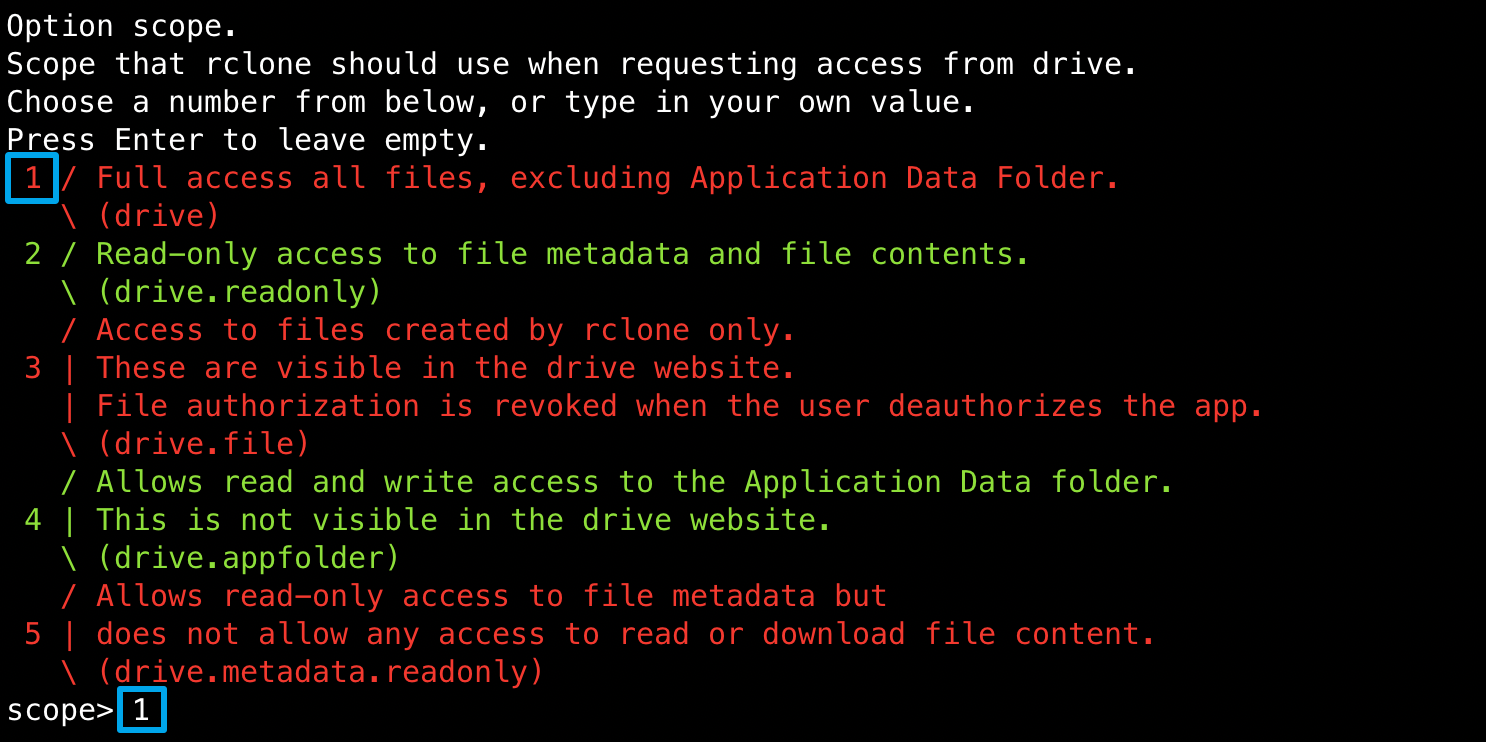
Now it asks for the scope, which has to do with access level basically. I want to have full access to all the files in drive so I will go with option 1. In essence full access will equip me with the ability to create, read, update, delete any files in my drive.
Next the prompt will ask for service_account_file which actually allows us to change the authentication method with Google Drive, simply leave it blank and hit enter.

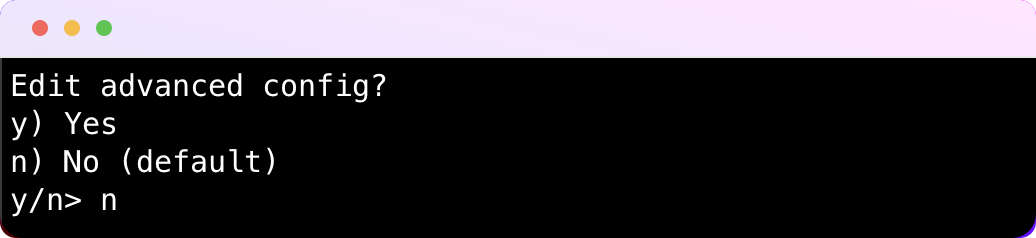
After that we will be asked if we want to use advanced configurations, of course not, not when are we just starting, so hit n for no (which is default) or enter.
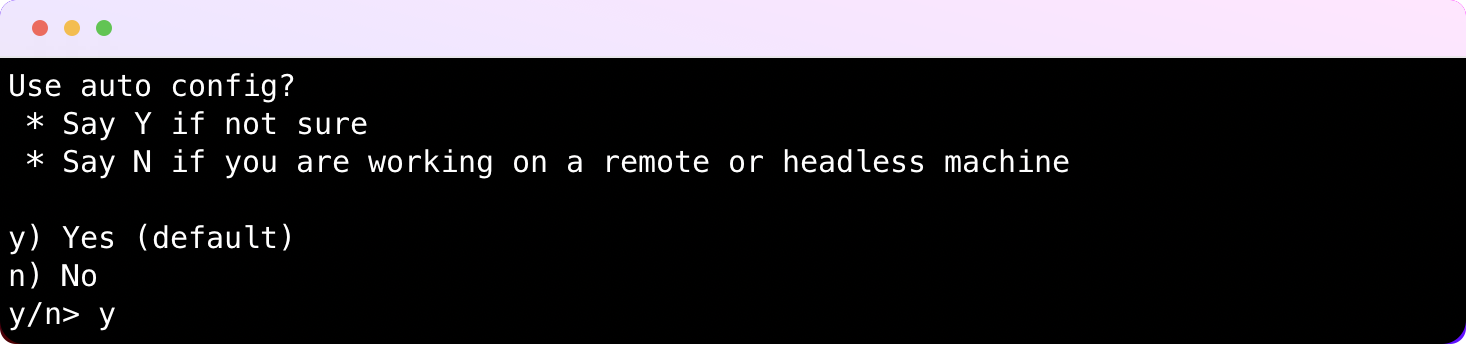
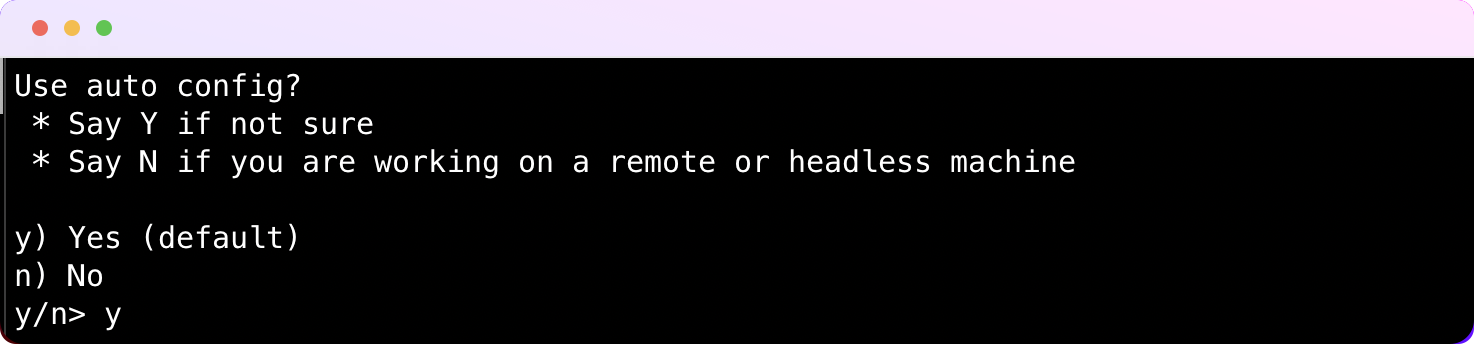
Now we will be asked whether we want to use auto config or not. If you configure rclone in your Mac, or Windows, or in another system with a GUI, you can say “yes” to this. If you were configuring rclone in a headless system (like SSHing into a Linux system with no GUI), you need to say “no” to this. Apparently I'm working on a GUI based OS so I will go with "yes".
This will launch your default browser with a Google Drive authorization page. Authorize rclone to access your Google Drive .
Now come back to the terminal and it will show the authorization status by printing Got code as a success message to the display. Next it will ask if we want to configure the remote as a Shared Drive. We will go with "no" because we want to mount our main storage as a remote and assuming you are using Google's free tier of Drive Storage (15 GB). The Shared Drives are available to Workspace accounts only, unless you are a member of one.
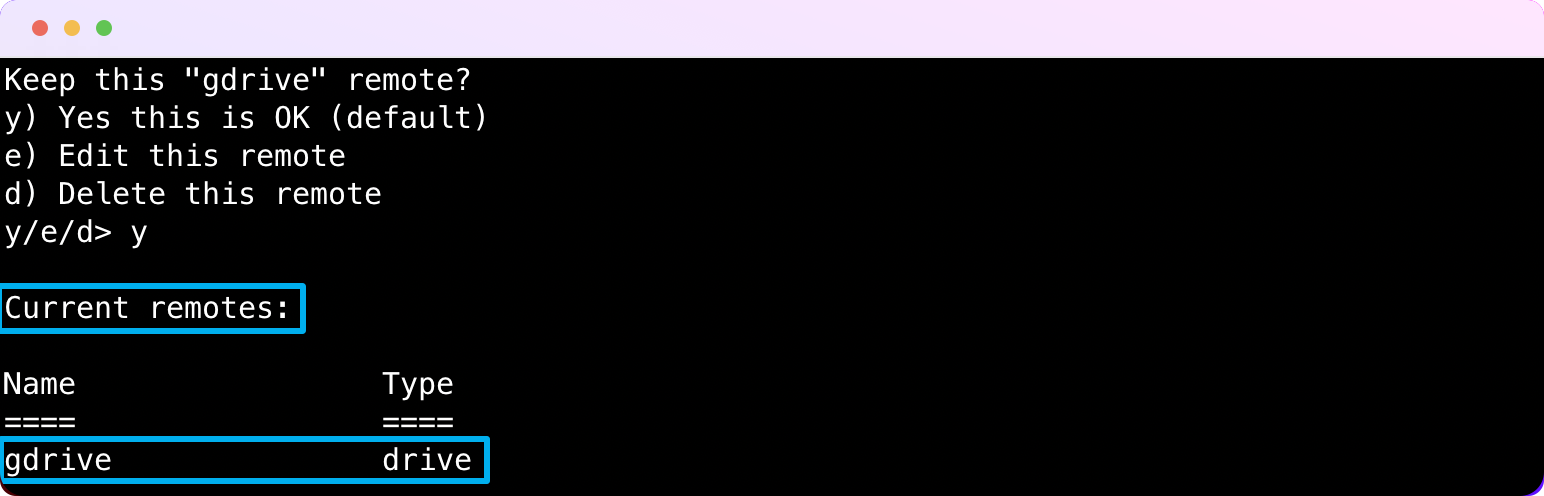
Finally, it will prompt if we want to save this as a remote configuration or make any edits (which we can make anytime though). Type y, hit enter and you are done. It will print the list of configured remotes on the screen and present with the interface we started with.
To exit out of the rclone interface press "q" and hit enter. Now that we successfully mounted our first remote, we are ready to interact with the files in our Google Drive.
🌲 Listing Remotes
To list all the configured remotes, run this command
$ rclone listremotes
As we keep adding more remotes, the list will be updated accordingly.
📝 Displaying contents
To display the contents of my remote (Google Drive), I need to pass the name of my remote as an argument to the rclone command along with the related option(s).
- lsd : this option is used to list directories.
- ls : this option is used to list all the files recursively in the specified path.
So the syntax of the command is:
$ rclone lsd remote_name:/
# OR
$ rclone ls remote_name:/
Here is the command in action listing the directories of my Google Drive.

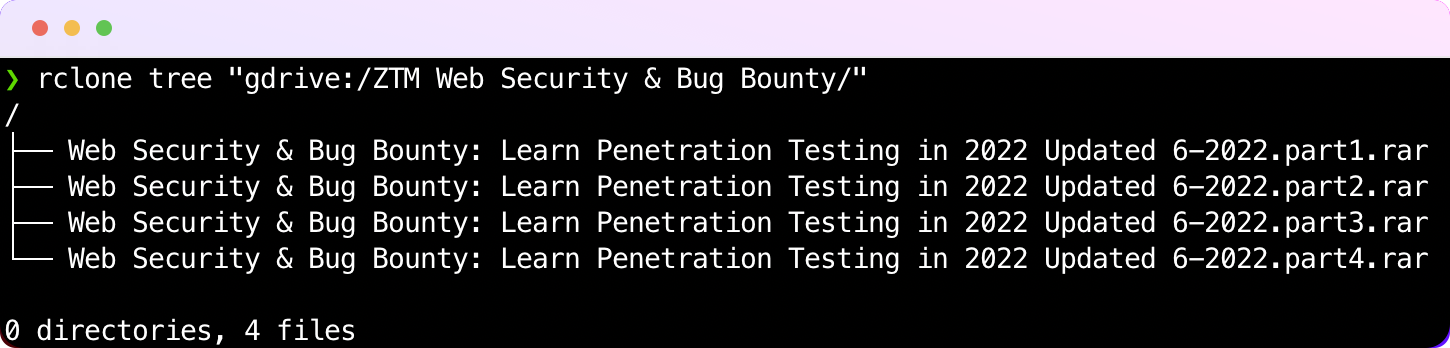
There is another interactive command which *unix users might be already familiar with. It's called tree which lists all the files and directories recursively in a tree like structure within a specified path.
$ rclone tree gdrive:/
💾 Calculating size
To get the information on available or used disk space of remote, we use about option with rclone command.
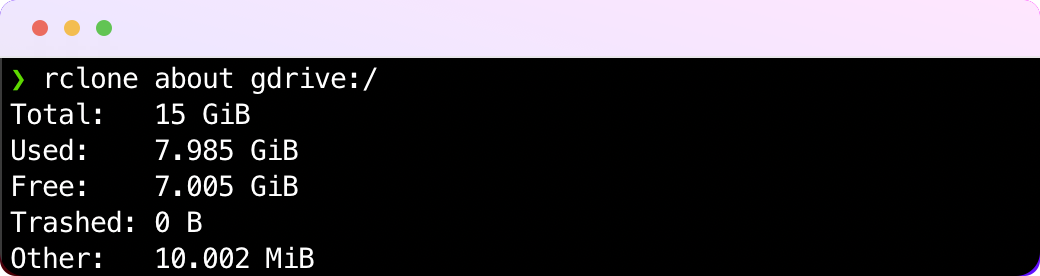
So that provides us with the general disk size info about the remote. What if we are interested in knowing the size of a specific file or directory! Well in that case we use size option with rclone command as follows:

As you can see I used double quotes around the remote directory path, you get it already. It is because the directory name contains spaces in it.
📁 Copying
Copying from remote to local
In order to copy contents from remote to local directory we use following command. The -P flag, displays the download progress of the operation.
$ rclone "remote:/path/to/file/" ~/Downlods/ -P
Suppose I want to copy a file Atomic-Habits-Hindi-Audiobook.mp3 from my remote to local Downloads directory, here is how I can achieve that

Copying from local to remote
Previously we copied file from remote to local directory, This time we will do it the other way around. The syntax stays same except we switch the source and destination like this:
$ rclone ~/Downloads/file "remote:/directory/" -P
Suppose I want to copy salam.pdf from my local Downloads folder to the remote. Here is how I can achieve that

📂 Moving
Moving files between remote and local is identical to that of copying, except we use move option instead of copy.
$ rclone move "remote:/dir/" ~/Downloads/ -P --dry-run
The above command will move dir folder from remote to the local Downloads folder. The --dry-run flag at the end is advised to include if you want to test the command without actually executing it. It comes handy to check for any errors prior the operation. You can use --dry-run flag with copy and move commands as well.
🗳 Sync
This command syncs source to destination, modifying only destination in the process. Destination is updated to match source, including deleting files if necessary. Here is the command syntax
$ rclone sync ~/Documents/ "remote:/docs_backup/" -P
🗑 Delete & Purge
If you want to delete the contents of a folder without deleting the folder itself then delete command should come to the mind. Here is the command syntax
$ rclone delete remote:/tmp_files/ -P
The above command will delete all the contents of tmp_files directory but the folder itself will be retained. However if you are interested in deleting the contents as well as the directory itself, then purge command is for you.
$ rclone purge remote:/trash/ -P
The above command deletes the trash directory along with it's contents.
🗃 rclone config
You are already familiar with rclone config command. that is actually how we started. The point here is all the remotes are stored in a config file. If you run rclone config file in your shell the path to this config file will be displayed on the screen. In my case it prints /Users/cosmicqbit/.config/rclone/rclone.conf. This file is actually of great importance. It stores all the critical information about the remotes configured. This file can be used on a fresh system to operate on the remotes without actually going through any configuration process. So always make sure you keep this file close to your vest. That brings us to the end.
💌 Conclusion
We covered all the basics of rclone & I hope this guide will help you to get started with rclone. This was just scratching the surface, nonetheless these commands are what we will be relying on most of the time. Besides official documentation is always have your back. Don't think as though you have to, but if you feel like it, give an upvote and share the blog post with your friends. Thank you for taking time to read this 😊
